

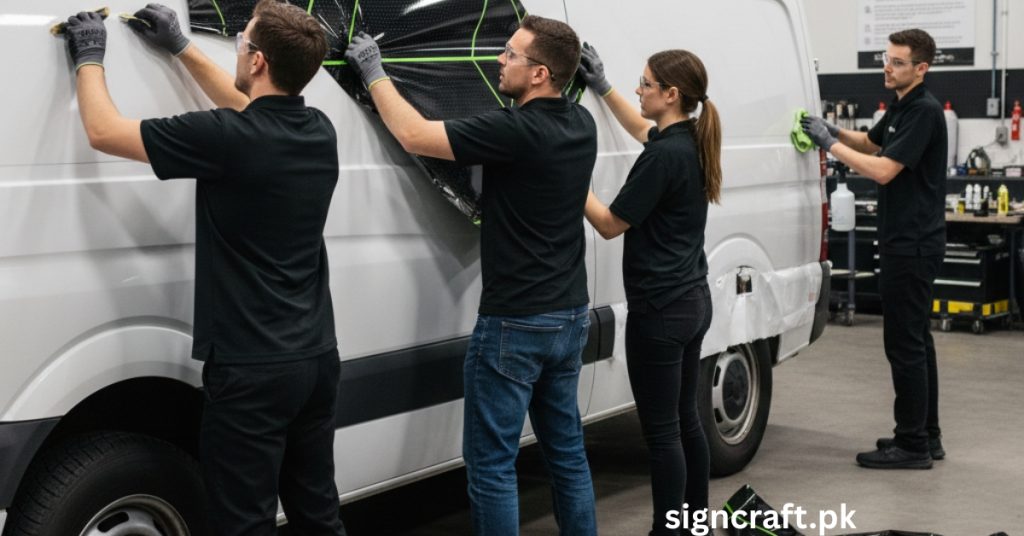
Vehicle Wrap Removal: Process and Best Practices
Vehicle wraps have become an incredibly popular marketing tool and aesthetic enhancement for businesses and individuals alike. These vinyl graphics transform ordinary vehicles into mobile billboards, protecting the original paint while showcasing vibrant designs. However, every wrap eventually reaches the end of its lifespan, typically after three to five years of exposure to the elements. Understanding the proper removal process is essential to preserve your vehicle's finish and avoid costly damage.
Whether you're updating your branding, selling your vehicle, or simply ready for a new look, removing a vehicle wrap requires careful planning and execution. This comprehensive guide explores the complete removal process, best practices, and professional insights to ensure your vehicle emerges unscathed.
At Sign Craft, we've handled countless vehicle wrap installations and removals, giving us unique insight into what makes the process successful. Our experience as a leading provider of signage solutions in Pakistan informs this detailed guide.
Need Professional Wrap Removal?
Contact Sign Craft's experts for safe, efficient vehicle wrap removal that protects your investment.
Call Us: +92 300 8599612 WhatsApp UsOr visit our Contact Page for more options
Understanding Vehicle Wraps and When to Remove Them
Vehicle wraps consist of specialized vinyl materials designed to adhere to automotive surfaces. These wraps serve multiple purposes, from commercial advertising to personal customization. The vinyl creates a protective layer over the original paint, shielding it from minor scratches, UV rays, and environmental contaminants.
Signs Your Vehicle Wrap Needs Removal
- Age and deterioration: Wraps older than five years typically show significant wear
- Adhesive failure: Edges lifting or peeling away from the surface
- Fading and discoloration: UV exposure causing colors to lose vibrancy
- Cracking and brittleness: Material becoming fragile and breaking apart
- Rebranding needs: Business logo or color scheme changes
- Vehicle sale or lease return: Returning to original appearance
The longer you wait beyond the optimal removal window, the more difficult the process becomes. Aged vinyl bonds more aggressively with the paint, and deteriorated adhesive leaves stubborn residue.
The Professional Vehicle Wrap Removal Process
Professional removal follows a systematic approach that prioritizes paint preservation while efficiently eliminating all wrap materials and adhesive residue.
Initial Assessment and Preparation
Before beginning removal, professionals evaluate the wrap's condition, age, and how it was originally installed. This assessment determines the appropriate removal strategy and identifies potential problem areas.
The vehicle should be cleaned thoroughly to remove surface dirt and contaminants. Working in a controlled environment with moderate temperatures (between 60-80°F or 15-27°C) yields the best results.
Heat Application
Heat is the cornerstone of successful wrap removal. Professional-grade heat guns or infrared heating systems warm the vinyl to approximately 120-140°F (49-60°C), softening both the vinyl and adhesive.
Professionals work in small sections, applying consistent heat across the surface. The goal is warming the vinyl sufficiently to release the adhesive bond without overheating any single area.
Vinyl Removal Technique
Starting at a corner or edge, professionals carefully lift the vinyl at a low angle—typically 15 to 45 degrees. This angle prevents the vinyl from tearing and ensures the adhesive releases cleanly.
The removal proceeds slowly and steadily, with continuous heat application just ahead of the pulling point. Quick, jerky movements cause tearing.
Adhesive Residue Removal
Even with perfect vinyl removal, adhesive residue typically remains on the paint surface. Professionals use specialized adhesive removers designed for automotive applications.
These citrus-based or petroleum-based solutions dissolve the adhesive without harming the paint. The remover is applied to small sections, allowed to penetrate, then wiped away with microfiber cloths.
Final Cleaning and Inspection
After complete residue removal, the entire vehicle receives a thorough wash using automotive soap. This removes any remaining chemicals and prepares the surface for inspection.
Professionals examine the paint for any issues that may have been hidden beneath the wrap, such as previous damage or paint defects.
DIY vs. Professional Removal: Making the Right Choice
| Factor | DIY Removal | Professional Removal |
|---|---|---|
| Time Required | 8-16 hours for full vehicle | 2-6 hours for full vehicle |
| Equipment Needed | Heat gun, adhesive remover, basic tools | Professional-grade heat systems, specialty tools |
| Risk of Damage | Higher (inexperience factor) | Minimal (expertise and insurance) |
| Quality of Results | Variable (depends on skill) | Consistently high |
| Best For | Small wraps, recent installations | Full vehicles, aged wraps, valuable vehicles |
While DIY removal is possible, several factors favor professional service. Older wraps, full vehicle coverage, and vehicles with significant value benefit most from professional expertise like that offered by Sign Craft's professional services.
Best Practices for Safe Vehicle Wrap Removal
Essential Tools for Proper Removal
Temperature Management
Maintaining optimal temperature throughout the process is crucial. Too little heat leaves adhesive behind; too much heat can damage paint, warp plastic trim, or create burn marks. Professionals continuously monitor temperature using infrared thermometers.
Common Mistakes to Avoid
- Attempting removal in extreme temperatures: Cold weather makes vinyl brittle; heat causes adhesive to become overly sticky
- Using excessive force: Aggressive pulling tears vinyl and potentially damages paint
- Neglecting adhesive residue: Leaving adhesive allows it to harden further and collect contaminants
- Using harsh chemicals or tools: Acetone or metal scrapers can permanently damage automotive paint
- Skipping post-removal care: Paint requires restoration after years under vinyl coverage
Post-Removal Care and Paint Restoration
Once the wrap is completely removed, your vehicle's paint requires restoration to look its best. Paint that's been covered for years may show contrast with areas that were exposed.
- Paint Decontamination: Clay bar treatment removes embedded contaminants that accumulated before wrap installation
- Paint Correction: Professional polishing addresses minor imperfections, swirl marks, or oxidation visible after wrap removal
- Protection Application: Consider ceramic coating, paint protection film, or traditional wax to preserve the refreshed appearance
Planning for Your Next Vehicle Wrap
If you're removing an old wrap to install a new one, timing and preparation are essential. The paint should be thoroughly cleaned, decontaminated, and inspected before new vinyl application. Any paint damage should be repaired, as wraps don't hide imperfections—they often accentuate them.
Working with a full-service provider like Sign Craft streamlines the transition from removal to new wrap installation. Their expertise in both processes ensures optimal results and minimizes vehicle downtime.
Ready for Professional Wrap Removal or a New Wrap?
Sign Craft offers comprehensive vehicle wrap services, from safe removal to stunning new installations. Contact our experts today!
Call Now: +92 300 8599612 WhatsApp ConsultationOr visit our Contact Page to schedule an appointment
Conclusion
Vehicle wrap removal is a specialized process requiring patience, proper technique, and appropriate tools. While DIY removal is possible for recent, well-maintained wraps, professional services provide superior results with minimal risk to your vehicle's finish.
Understanding the removal process, recognizing when removal is necessary, and following best practices protect your investment in both the wrap and the vehicle itself. Whether you're updating your business branding, preparing a vehicle for sale, or simply ready for a new aesthetic, proper wrap removal ensures your vehicle looks its best.
For businesses and individuals in Pakistan seeking expert wrap removal services, Sign Craft offers professional solutions backed by experience and commitment to quality. Their comprehensive approach ensures your vehicle receives the careful attention it deserves throughout the removal process and beyond.
Explore More Signage Insights from Sign Craft
Visit our Services Page to explore all our signage solutions